Afraid of losing or having your device stolen?
Worried about people getting information or pictures off of your device?
Read on to find out 4 quick and simple ways you can protect your device and yourself from a loss of phone and your privacy.
1.
Sign up for and install a device locating App
On iOS devices including iPods, iPads, and iPhones the most common and free App to use is
Find My iPhone. By installing this App on your device and tying it to your AppleID you will be able to see where your device is at any time as long as it is enabled and connected to a network such as cellular or Wifi.
It is important to note the just like when you are using your phone the specificity of the location is affected by things like whether your GPS or other location services are enabled, where the more stuff you keep turned on the more accurate the location will be.
This app also allows you to ping your device making it beep, if for example you lost it somewhere in your room.
Android has several similar types of software. The one currently recommended is
SeekDroid. This freemium software in its free mode allows you to do similar location finding features as Find My iPhone. Premium additional features are available depending on your needs.
2.
Password protect your device
A password or lock screen on your device is your first line of defense in preventing anyone be they friend or foe from accessing your device. Why does it matter if someone can access your device? A quick look at what we all keep on these devices helps to answer that. Would you want someone posting as you to your facebook or twitter account.
How about photos that you may have taken? Do you have any photos you wouldn't want to be displayed on the front of the newspaper? While it isn't a good idea to take such photos in the first place, as a quick look at celebrities that have recently had their phones broken into and regretted the results demonstrates. Keeping these pictures on your device without locking it is asking for trouble.
To make matters even worse most of the time our devices contain lots of information about us that can be used for identity theft. Things like account numbers, banks cached credentials and contact information that can be used to pretend someone is us.
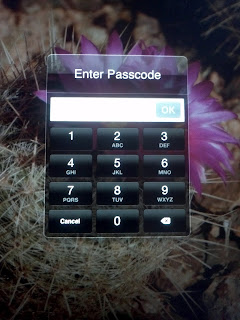
So how should you protect your device with a password? On iOS the easiest solution is to choose a minimum of a 4 digit PIN number that isn't repeating or simple. For example, bad PINs are things like 1234, 1111, or 5555.
On android devices I recommend also using a minimum of a 4 digit PIN. The swipe code is generally not a good protection mechanism because it is easy to see the fingerprint trail on the screen.
3.
Encrypt your device
The good news for iOS users is encryption happens automatically if you have a password on the device in all newer versions of iOS. If you have an old Apple device, you should upgrade the iOS version and then enable a password to secure the device.
On Android devices the risks from an unencrypted devices are even greater because of the access to the file system via USB. Due to the variety of devices and vendors, to find out how exactly to encrypt your specific device it is recommended that you Google it; however it will typically be in the
Settings > Security options.
4.
Record your Device's Information
If your device does get lost or stolen, you should have as much information about it as possible. This would include numbers like your ASN/IMEI or SIM number, your MAC address, model number and any other distinguishing features such as marks, or damage. All of this information will assist law enforcement in verifying or returning your device.
In iOS you can get this information by going
to Settings > General > About.
On Android devices this is generally available by going to
Settings > About device > Status.
With these steps in place you are on your way to protecting a tool that has become an important part of our daily lives.


