Tuesday, February 5, 2013

Lync Enterprise 2013 Front End Service not Starting

Problem: On Lync 2013 Enterprise Edition running on Windows Server 2012 the front end service will no start and just sits at Starting.

Scenerio: This problem seems to occur if you are deploying a single Lync 2013 Front End server on Windows server 2012. GoogleFu seems to point toward this being an SChannel or certificate issue. This was not the issue for.

Resolution: It appears that Lync 2013 enterprise that requires you to have 2 front end servers. Once we added the 2nd front end server to the Lync topology the front end service on both servers started with no issues.  In taking with Lync 2013 experts, it appears that something has changed with the Fabric Model in 2013 that requires redundancy from the start instead of being able to add it after the fact.

Monday, October 8, 2012

Change UserPrincipalName with Script via Powershell

When setting up single sign on in Office 365, one problem you may run into is needing to change the UserPrincipalName to match your public mail domain. For example, if your primary Active Directory Domain is something like @domain.local it will not work with Office 365 and you will need to change the UserPrincipalName to @domain.com.

After you have created the alternate UPN as described in http://techatmount.blogspot.com/2012/09/office-365-single-sign-on-errors.html, you can script the change the of UPN of users to a different UPN using the following powershell script.

I played around with the formatting of the code below to get it nicely color coded. This means that some of the line breaks don't show well here, but a copy and a paste into notepad should format it properly.

Import-Module ActiveDirectory            
$privateUPN = 'domain.local'            
$publicUPN = 'domain.edu'            
Get-ADUser -SearchBase "ou=Students,dc=domain,dc=com" -SearchScope SubTree -filter * |             
ForEach-Object {if ($_.UserPrincipalName){#Checks if the UserPrincipalName is null            
 $newUserName = $_.UserPrincipalName.Replace($privateUPN,$publicUPN) #Changes the UPN and sets the new name to a variable            
 <# The following is to output extra details for troubleshooting  : Note the line continuation is a back tick#>            
 #Write-Host $_.UserPrincipalName " now is " $newUserName -ForegroundColor DarkRed `            
 $_ | Set-ADUser -Server $privateUPN -UserPrincipalName $newUserName <#-WhatIf#>}#The whatif commands doesn't actaully change anything remove it to make the change.            
 else {Write-Host $_.sAMAccountName + " does not have a UPN" -ForegroundColor DarkCyan}            
 #{$newUserName = $_.UserPrincipalName.Replace($privateUPN,$publicUPN))}            
 }


Friday, October 5, 2012

GroupPrincipal.FindbyIndentity Search returns Well Known SID Error

We use a custom program to assist in the creation and management of our Active Directory User Accounts. In this we use the DirectoryServices.AccountManagement namespace released in .net 3.5 to do much of the interaction with AD.

One of the processes that gets completed is to find what groups a user should be in based on their department and add the user to that group.

In doing this, I use the following code to search for the group based on their name.

Dim domainContext As PrincipalContextdomainContext = New PrincipalContext(ContextType.Domain, "campus", "OU=" & Me.Department & ",OU=" & Me.accountType & ",DC=domain,DC=com")Dim group As GroupPrincipalgroup = GroupPrincipal.FindByIdentity(domainContext, Me.Department)

Problem

A problem arose while searching for some of our departments. For example our Communications department is identified as 'CO' and our Education department is identified as 'ED'. When we searched for the value 'CO' assigned to Me.Department, the identity found was the well known SID "Creator Owner." When we would search for 'ED', the group found was "Enterprise Domain Controllers" instead of the expected group 'ED'.

We would also receive the following error when trying to create the user account.
This principal object represents a well-known SID and does not correspond to an actual store object. This operation is not supported on it.

Solution


The solution to the problem was actually pretty quick.
Change

group = GroupPrincipal.FindByIdentity(domainContext, Me.Department)

to

group = GroupPrincipal.FindByIdentity(domainContext, IdentityType.SamAccountName, Me.Department)

so you are only searching against the sAMAccountName or you can choose a different IdentityType to search against. The options include

  • DistinguishedName
  • Guid
  • sAMAccountName
  • Name
  • Sid
  • UserPrincipalName
Additionally trying to catch the MultipleMatchesException did not resolve the problem because it was never thrown during the search process.

Hopefully this will help save some searching.

Wednesday, October 3, 2012

Spear Phishing Attempts

We have recently been receiving several different types of spear phishing attempts. These messages contain customized institutional headers and information of interest specific to the users they were sent to. For example, fake recruiting information was sent to admissions and vice presidents.

Your mailbox has exceeded the storage limit which is 20GB ,You are currently running on 20.9GB. You may not be able to send or receive new mail until you re-validate your mailbox. To re-validate your mailbox please click the link below: http://alert.xp3.biz/system_administrator_account_validate_html/


http://sheltonspringhomes.com/1hceqer2/index.html

We have notified users of the phishing emails and tried to sink hole the DNS addresses.

Thursday, September 20, 2012

Office 365 Single Sign On Errors

Figure 1
We are currently in the midst of setting up a Hybrid Implementation involving Exchange 2010 and Office 365 for Education where we will eventually migrate our student mail from On-Premise Exchange to Office 365.

To enable SSO you need the following items.

  • Properly configured ADFS or Active Directory Federated Services Environment
  • Office 365 domain with verified Public Domain i.e. domain.edu
  • Follow instructions from a blog like this to enable SSO
If you have completed these steps, you should be able verify the ADFS setup by visiting the URL https://adfs.domain.com/adfs/ls/IdpInitiatedSignon.aspx from a variety of places both internal and external clients.

To test Single Sign-On for Office 365 go to https://portal.microsoftonline.com. You should try to login with username@domain.com and it will change your to a page similar to Figure 1. When you click on the Sign in at domain.com link, it should redirect to your ADFS environment and either login you in automatically or prompt for credentials based on configuration, current user credentials, and browser.

Your organization could not sign you in to this service
If you enter your credentials and receive the following error, "Your organization could not sign you into this service" as shown in the image, the solution is most likely related to the UPN that is currently configured in Active Directory.  The UPN for the user that is attempting to login needs to match that user's UPN in AD. This is typically an issue when you are using a private internal domain name such as domain.local

Solution

First you need to add the UPN if it doesn't currently exists in AD. 
  1. Open Active Directory Domains and Trusts
  2. Right click on the top item  Active Directory Domains and Trusts and choose Properties.
  3. Add your alternate UPN public UPN suffix. i.e. domain.com
Second go to Active Directory Users and Computers 
  1. Open the properties of the user you are testing.
  2. Go to the Account tab.
  3. Under User logon name: change the drop down item to the new @domain.com name.
You should now be able to login to Office 365 using your local credentials.
WARNING: This may affect other things if you have people using the private UPN to login elsewhere, so be careful.

Wednesday, September 5, 2012

4 Ways to Protect Your Mobile Device

Afraid of losing or having your device stolen?

Worried about people getting information or pictures off of your device?

Read on to find out 4 quick and simple ways you can protect your device and yourself from a loss of phone and your privacy.

1. Sign up for and install a device locating App

On iOS devices including iPods, iPads, and iPhones the most common and free App to use is Find My iPhone. By installing this App on your device and tying it to your AppleID you will be able to see where your device is at any time as long as it is enabled and connected to a network such as cellular or Wifi.

It is important to note the just like when you are using your phone the specificity of the location is affected by things like whether your GPS or other location services are enabled, where the more stuff you keep turned on the more accurate the location will be.

This app also allows you to ping your device making it beep, if for example you lost it somewhere in your room.

Android has several similar types of software. The one currently recommended is SeekDroid.  This freemium software in its free mode allows you to do similar location finding features as Find My iPhone. Premium additional features are available depending on your needs.
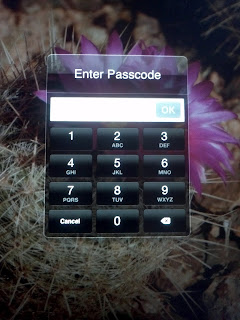
2. Password protect your device

A password or lock screen on your device is your first line of defense in preventing anyone be they friend or foe from accessing your device. Why does it matter if someone can access your device? A quick look at what we all keep on these devices helps to answer that. Would you want someone posting as you to your facebook or twitter account.

How about photos that you may have taken? Do you have any photos you wouldn't want to be displayed on the front of the newspaper? While it isn't a good idea to take such photos in the first place, as a quick look at celebrities that have recently had their phones broken into and regretted the results demonstrates. Keeping these pictures on your device without locking it is asking for trouble.

To make matters even worse most of the time our devices contain lots of information about us that can be used for identity theft. Things like account numbers, banks cached credentials and contact information that can be used to pretend someone is us.

So how should you protect your device with a password? On iOS the easiest solution is to choose a minimum of a 4 digit PIN number that isn't repeating or simple. For example, bad PINs are things like 1234, 1111, or 5555.

On android devices I recommend also using a minimum of a 4 digit PIN. The swipe code is generally not a good protection mechanism because it is easy to see the fingerprint trail on the screen.

3. Encrypt your device

The good news for iOS users is encryption happens automatically if you have a password on the device in all newer versions of iOS. If you have an old Apple device, you should upgrade the iOS version and then enable a password to secure the device.

On Android devices the risks from an unencrypted devices are even greater because of the access to the file system via USB. Due to the variety of devices and vendors, to find out how exactly to encrypt your specific device it is recommended that you Google it; however it will typically be in the Settings > Security options.

4. Record your Device's Information

If your device does get lost or stolen, you should have as much information about it as possible. This would include numbers like your ASN/IMEI or SIM number, your MAC address, model number and any other distinguishing features such as marks, or damage.  All of this information will assist law enforcement in verifying or returning your device.


In iOS you can get this information by going to Settings > General > About.
On Android devices this is generally available by going to Settings > About device > Status.

 With these steps in place you are on your way to protecting a tool that has become an important part of our daily lives.

Wednesday, June 20, 2012

Putting Voicemail on Exchange 2010

A major driver for our upgrade to Exchange 2010 is to migrate voice-mail off of our Nortel CS1000 system that currently uses Callpilot to having voice-mail handled by Exchange's Unified Messaging features.

The push for this was the continued expanse of upgrading the Call Pilot voicemail system while receiving no new functionality. By moving voicemail to be handled by exchange we ended up spending a little less than 1/3 of the call pilot cost while receiving several new features.

For this upgrade we received assistance from the Via Group. The designed the upgrade process and handled the work on the Audiocodes device, as well as providing UM and Exchange Assistance as required.

The basic concept for getting Voicemail to to exchange was the following:
-*Prereq. - Have Exchange installed with a server that has the UM role.
Voicemail in Exchange instead of Nortel - Basic Configuration
  1. Purchase an AudioCodes Gateway device that essentially acts as a go between for the Analog Nortel Switch and the Exchange UM server.
  2. We previously had 4 ISDN Line's as our PRIs from the PTSN. This allowed a maximum of 92 concurrent Incoming or Outgoing calls.
  3. We moved one of these PRI's to connect to the AudioCodes Device as a QSIG Trunk, provided a capacity of 23 concurrent connections to the new voicemail server, that leaves 69 concurrent calls allowed in or out of campus.
  4. Create the Dial Plans and Policy inside of Exchange Unified Messaging. If you are looking for a good walk-through on this refer to here.
  5. Concerning Certificates, we have an enterprise CA that we used to sign the certificate on both the AudioCodes Device and for the UM role in Exchange.
    - Note: Both these devices will need to use the FQDN of the UM server and the DNS address you create for audiocodes gateway. This allows them to do TLS encryption between devices. If you follow this route you will also need to install the root certificates on the AudioCodes Devices
  6. Assign Mailboxes to phone numbers in Exchange
  7. Ensure Receive Connectors on 2010 CAS are able to accept messages from the UM. (More on this below)
With these steps completed you should be able to receive Voicemail messages in Exchange. Below are a couple of the errors and troubleshooting steps we needed to take.
  1. Voicemails not being received in Exchange from "Unauthenticated Callers" ( An unauthenticated caller is anyone whose phone is not in the UM. This means numbers outside the organization and anyone on the legacy Nortel system.)
  • Error Messages included the voicemails collecting in InstallDrive:\\Program Files\Microsoft\Exchange Server\V14\UnifiedMessaging\voicemail.
  • In the windows application log we were also seeing the following:  
    The Unified Messaging server encountered an error while trying to process the message with header file "C:\Program Files\Microsoft\Exchange Server\V14\UnifiedMessaging\voicemail\53fd3299-40b3-42d2-bf02-02b09edacf1f.txt". Error details: "Microsoft.Exchange.UM.UMCore.SmtpSubmissionException: Submission to the Hub Transport server failed. The operation will be retried. ---> Microsoft.Exchange.Net.ExSmtpClient.UnexpectedSmtpServerResponseException: Unexpected SMTP server response. Expected: 220, actual: 500, whole response: 500 5.3.3 Unrecognized command

       at Microsoft.Exchange.Net.ExSmtpClient.SmtpTalk.CheckResponse(ServerResponseInfo response, Int32 expectedCode)
       at Microsoft.Exchange.Net.ExSmtpClient.SmtpTalk.Command(SmtpChunk[] chunks, SmtpCommandType command, Int32 expectedCode)
       at Microsoft.Exchange.Net.ExSmtpClient.SmtpTalk.StartTls()
       at Microsoft.Exchange.Net.ExSmtpClient.SmtpClient.Submit(Boolean disableDelayedAck)
       at Microsoft.Exchange.UM.UMCore.SmtpSubmissionHelper.SubmitMessage(MessageItem message, String senderAddress, String recipientAddress, OutboundConversionOptions submissionConversionOptions, InternalExchangeServer smtpServer)
       at Microsoft.Exchange.UM.UMCore.SmtpSubmissionHelper.SubmitMessage(MessageItem message, String senderAddress, String recipientAddress, OutboundConversionOptions submissionConversionOptions, String requestId)
       --- End of inner exception stack trace ---

    Server stack trace:
       at Microsoft.Exchange.UM.UMCore.SmtpSubmissionHelper.HandleTransientSmtpFailure(Exception e, InternalExchangeServer smtpServer, String recipientAddress)
       at Microsoft.Exchange.UM.UMCore.SmtpSubmissionHelper.SubmitMessage(MessageItem message, String senderAddress, String recipientAddress, OutboundConversionOptions submissionConversionOptions, String requestId)
       at Microsoft.Exchange.UM.UMCore.SmtpSubmitStage.InternalDoSynchronousWork()
       at System.Runtime.Remoting.Messaging.StackBuilderSink._PrivateProcessMessage(IntPtr md, Object[] args, Object server, Int32 methodPtr, Boolean fExecuteInContext, Object[]& outArgs)
       at System.Runtime.Remoting.Messaging.StackBuilderSink.AsyncProcessMessage(IMessage msg, IMessageSink replySink)

    Exception rethrown at [0]:
       at System.Runtime.Remoting.Proxies.RealProxy.EndInvokeHelper(Message reqMsg, Boolean bProxyCase)
       at System.Runtime.Remoting.Proxies.RemotingProxy.Invoke(Object NotUsed, MessageData& msgData)
       at Microsoft.Exchange.UM.UMCore.SynchronousPipelineStageBase.SynchronousWorkDelegate.EndInvoke(IAsyncResult result)
       at Microsoft.Exchange.UM.UMCore.SynchronousPipelineStageBase.EndSynchronousWork(IAsyncResult r)"
  • The solution for this was to create a custom receive connector on the 2010 Hub transport role because the Default one had to be modified to excluded other addresses to properly receive from internet. The settings we have are General Tab > FQDN = internal FQDN(must have a certificate); Network tab > Receive mail from remote servers includes: Addresses of 2010 UM server, CAS server and 2007 CAS; Authentication Tab > Check TLS, Mutual Auth TLS, Exchange Server Authentication; Permission Groups Tab > Check all users.
Best of Luck in your setup.